
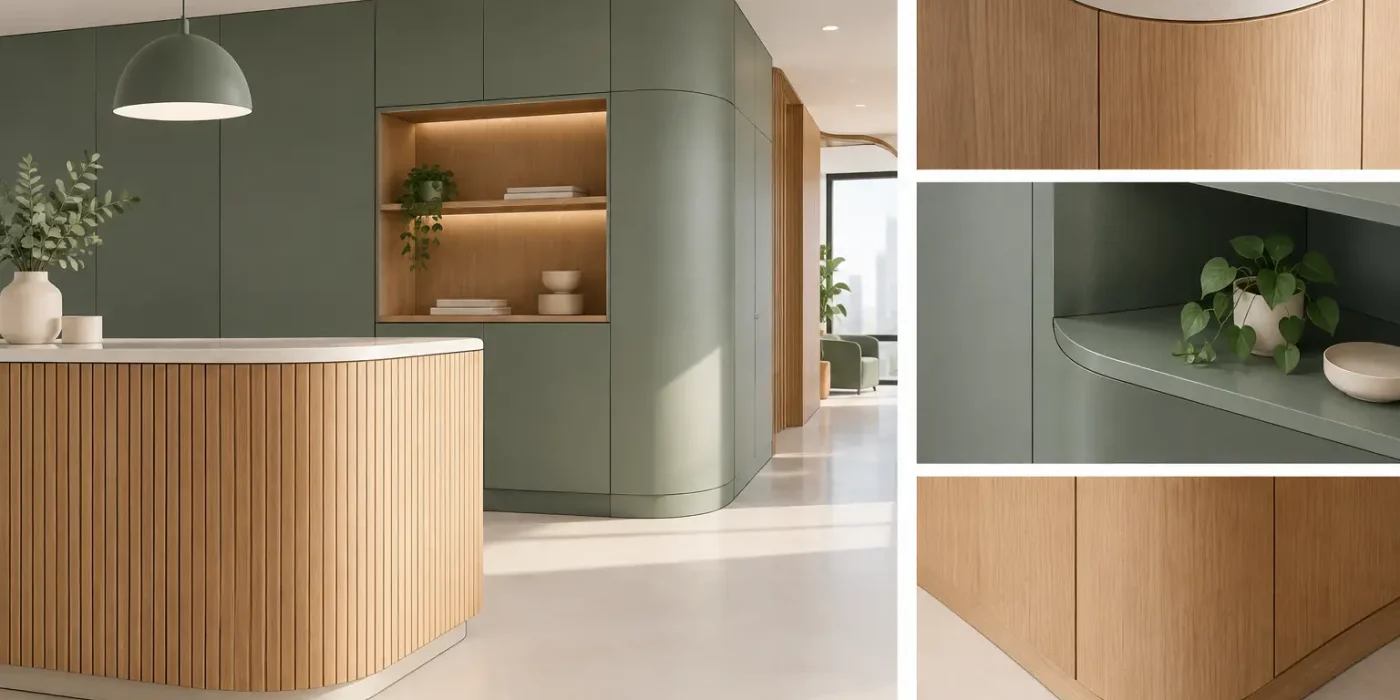
A curved reception desk, fluted wall, radius banquette, or sweeping ceiling bulkhead can define an interior. It can also become the point where an otherwise coordinated fit-out loses time, material, and finish quality. The best details for curved joinery turn a visual curve into a controlled fabrication and installation sequence, with clear geometry, realistic materials, and defined interfaces.
For hotels, villas, retail stores, restaurants, and commercial interiors, curved elements should not be treated as standard joinery with a different elevation. Their performance depends on the information behind the visible face: radii, setting-out points, substrate build-up, joint locations, grain direction, access, tolerances, and the relationship to adjoining finishes. When these items are resolved in the shop drawing stage, the manufacturing team can price, produce, and install with confidence.
Start With Geometry That Can Be Set Out
A curve must be measurable before it can be made. A plan or rendered perspective may communicate design intent, but fabricators need geometry that supports cutting, bending, templating, and site verification. The drawing package should identify whether the form is a true radius, an elliptical curve, a freeform spline, or a sequence of straight facets intended to read as a curve.
For true-radius work, show the center point, radius dimension, chord dimensions where useful, and the start and end tangent points. These references allow the workshop and site team to set out the component from consistent control points. A dimension reading only “R 1200” is rarely sufficient when the curve must connect precisely to a straight run, door return, column, or floor pattern.
Freeform shapes require even greater discipline. Provide coordinated plan, elevation, and section views, supported by a dimensioned grid or coordinate schedule. If the component is generated from a 3D model, the drawing should still state the governing dimensions and reference datums. Fabricators should not be asked to interpret an aesthetic profile from a rendering or an unverified model export.
Site conditions matter as much as drawing geometry. Before releasing curved joinery for production, verify the as-built location of structural walls, columns, floor levels, and MEP penetrations. A minor deviation in a radial wall can create an obvious uneven gap along a long curved panel. Where the risk is high, include a field-template or laser-survey requirement in the technical documentation.
Best Details for Curved Joinery Begin With the Substrate
The finish layer is only as accurate as the structure beneath it. Curved joinery details should clearly distinguish between the visible finish, the flexible backing or carrier, the framing system, and the fixing method. This is particularly important where the design calls for timber veneer, laminate, solid-surface material, metal, upholstered panels, or decorative fluting.
A curved plywood substrate may be appropriate for a painted wall feature or a veneered reception front, provided the specified bending radius suits the board thickness and grain orientation. Tight radii may require laminated layers, kerf-cut boards, CNC-cut ribs with flexible skins, or purpose-made bending plywood. Each solution has different implications for labor, stability, cost, and finished appearance.
The section detail should state the substrate thickness, rib spacing where applicable, backing support, adhesive or mechanical fixing strategy, and the required flatness of the finished surface. This prevents a common failure: a visually smooth curve that reveals telegraphing ribs, adhesive lines, or segmented backing through a high-gloss paint or thin veneer finish.
For freestanding items such as curved counters and banquettes, show the internal frame as well as the external cladding. The frame must carry countertop loads, accommodate service routes, resist impact at the base, and allow transport into the building. A single large curved unit may look efficient on paper but be impossible to move through a finished lobby, service elevator, or corridor. Shop drawings should therefore identify practical module breaks and the method of reassembly.
Match the Material to the Radius
Not every finish can make every curve. Natural veneer may be pressed successfully around a generous radius, but it can split, spring back, or show inconsistent grain on a tight return. HPL can perform well on suitable radii, while some decorative laminates have manufacturer-specific minimum bending limits. Solid-surface material can be thermoformed, but the process needs controlled temperatures, approved molds, and realistic allowances for fabrication.
Metal cladding introduces another set of variables. Brushed stainless steel, bronze-effect metal, and powder-coated aluminum may show distortion, oil-canning, or inconsistent brushing if the backing is uneven. The detail should establish sheet thickness, bending direction, fold returns, joint treatment, and whether the finish runs continuously around the curve or is divided into planned panels.
For timber finishes, specify the grain direction at every curved face. A continuous horizontal grain can reinforce the shape of a reception desk, whereas vertical grain may better suit a tall fluted wall. The choice affects veneer yield, matching requirements, panel joint positions, and cost. It should be deliberate rather than left to workshop interpretation.
Control Joints, Reveals, and Panel Breaks
Curved joinery is rarely fabricated as one uninterrupted surface. The strongest detail is not the one that hides every joint at any cost. It is the one that positions joints where they are technically achievable and visually intentional.
Use shadow gaps, metal inlays, expressed reveals, changes of material, or fluted rhythm to divide a curved elevation into manageable modules. A 10 mm reveal may accommodate movement and installation tolerance while giving the composition a crisp architectural line. On a reception counter, a planned joint at a drawer division or service access point is usually more convincing than a random seam placed where a sheet ends.
Joint strategy must account for the material. Veneer joints need matching and grain continuity requirements. Stone or sintered-surface returns need support and carefully located seams to avoid weak narrow pieces. Upholstered curved panels need consistent segmentation, stitching, foam build-up, and alignment with the underlying frame. The drawing should show these decisions in elevation and section, not merely note “as per approved sample.”
Where a curved unit meets a wall, floor, ceiling, or glazed partition, avoid assuming the adjoining construction is perfectly true. Define a scribe allowance, flexible sealant joint, shadow gap, or cover trim. This is especially relevant in fit-out projects where base-build tolerances and multiple trade interfaces can affect final alignment.
Detail the Interfaces Before They Become Site Problems
The most costly curved-joinery issues often occur at interfaces. A curved wall may intersect a linear ceiling feature, a stone floor border, an air-conditioning grille, or a fire-rated door frame. Each crossing needs a coordinated section and a clear responsibility for tolerances and finishing.
For example, if a curved timber bulkhead contains recessed linear lighting, the detail should establish the lighting channel profile, driver access, heat clearance, cable route, finish return, and the shadow line seen from normal viewing positions. If a banquette wraps around a column, the documentation should confirm whether the column is centered, whether a movement gap is needed, and how skirting or flooring terminates behind the seating.
Services deserve early attention. Reception desks and retail counters frequently include power, data, POS equipment, refrigeration, display lighting, or access-control devices. Curved fronts can restrict internal access and make conventional cable routes impractical. Coordinate penetrations, removable panels, ventilation grilles, and maintenance zones before the framing is fixed.
Use Tolerances as a Design Tool
Precision does not mean pretending that site work has zero variation. It means identifying where variation can occur and designing the detail to absorb it without compromising the intended result. Curved work needs tolerance planning for setting out, substrate fabrication, finish application, transportation, and final installation.
A long radius wall with a flush finish may need adjustable brackets behind the substrate. A curved stone counter may need concealed packers and a controlled silicone joint at a wall return. A feature panel meeting an uneven slab soffit may require a top shadow gap rather than a hard, flush junction.
The shop drawing should also state the critical visual tolerances. These may include consistent reveal width, alignment of flutes, continuity of lighting lines, and level countertop edges. Not every dimension carries the same visual importance. Highlighting the critical items helps the workshop and site team focus quality checks where they matter most.
Coordinate Drawings, Samples, and Approvals
Curved joinery benefits from a disciplined approval sequence. First, coordinate the geometry with architecture, interiors, structure, and MEP. Then issue fabrication-level plans, elevations, sections, details, and component schedules. Finally, review material samples, mock-ups, or first-off pieces where the curve, finish, and joint treatment are visually sensitive.
A sample confirms color and texture, but a mock-up can test the complete assembly. It reveals whether veneer is cracking at the radius, whether a reveal remains even, whether a metal finish reflects backing imperfections, and whether lighting creates unwanted shadows. For prominent lobby, hospitality, and retail features, this step often protects both the design intent and the project budget.
Design Studio LLC develops accurate, comprehensive joinery shop drawings that give project teams this level of control. With coordinated documentation, curved work becomes easier to price, fabricate, inspect, and install across demanding fit-out environments.
The best curved detail is the one that still looks intentional after survey adjustments, workshop handling, and final site installation. Define the geometry, build the right substrate, plan the joints, and give every interface a clear answer before the first panel reaches the factory floor.
Comments (01)